
Tinkering around the roof sounds fun, and we all know it’s sometimes vital to get up there and take care of the issues for the sake of your home’s long-term safety. Still, all experienced roof repair professionals and construction workers will tell you that you should never, ever compromise your safety by climbing and fiddling on the rooftop without adequate equipment since this can result in serious injuries or even casualties due to slips and falls.
Apart from thick-soled boots, gloves, and helmets, rooftop works involve use of safety harnesses, belts, anchor points, and other Personal Fall Arrest (PFA) system components. But how do you exactly use a roof safety harness and which altitudes do you need to use it at?
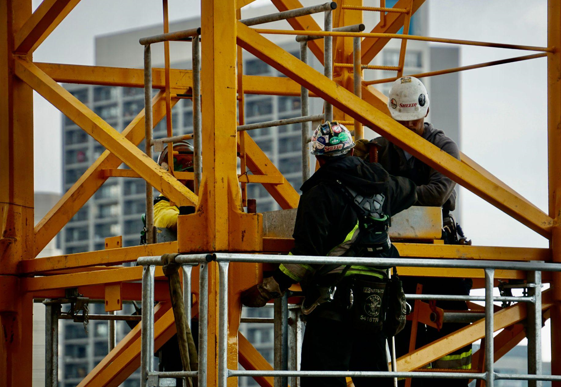
Prepping the Roof Safety Harness
Note that safety harness ought to be worn during roof works at any altitude since the failure to follow safety regulations can have grave and even life-threatening consequences. Before putting the harness into use, you will first need to inspect it for signs of damage. In case the harness has endured a fall and sustained any damage or tear, it needs to be removed from service.
You can see whether you can have it replaced with the manufacturer or order a new one before launching works. If this piece of safety gear hasn’t received any tears or damage, you can proceed with fitting your sturdy roof safety harness around the legs and chest.
For optimal safety and comfort, the straps shouldn’t restrict your breathing or movements, but you need to make sure they aren’t loose either as they could easily get caught on a protruding surface.
On top of compromising safety, loose harness straps can cause orthostatic trauma, which is why you want to keep them snug, secure, and comfortable at all times. Also, it’s not advisable to share your roof safety harness with other roofers since each set has to be a good fit for the wearer to prevent injuries due to size differences.
Estimate Fall Distance Beforehand
To stay on the safe side of the roof at all times, you will also need to work out total fall distance. Defined as the minimum vertical distance between the dorsal D-ring and the lower level (i.e. the roof or the ground, depending on the site conditions), precise total fall distance estimate will make sure you don’t hit the ground in case of an accident.
Legal PFA regulations differ by state and sometimes even by municipality. For example, OSHA guidelines state PFAS must not allow altitude workers to fall more than six feet without slowing the fall and thus make contact with the ground or a lower roof level.
To get a precise estimate of total fall distance, you need to add up freefall distance, deceleration distance, slack in the harness, back D-ring height, and safety margin. Bear in mind that freefall distance stands for the distance you are allowed to fall before PFAS gear slows you down, whereas deceleration distance is the length the lanyard can be stretched to help arrest the fall
. In OSHA regulations, this figure is set at up to 3.5 feet, but local standards may be somewhat different so be sure to check them on time. Also, bear in mind that slack in the harness will depend on harness construction, roofer weight, and their load during work. Back D-ring height is the measurement that shows the roofer’s height from their feet to the D-ring. Lastly, the safety margin is typically set at two feet, but local regulations might list a different figure, so check the fact sheet beforehand, just to play the roof game safe from both the physical and regulatory standpoint.
Install the Anchor Point and Attach PFA
Once you’ve worked out the fall distance and made sure the equipment is in good working order, you can proceed with installing the anchor point on the roof in keeping with the manufacturer’s guidelines. Should you come across any difficulties accessing the top of a steep sloped roof or similar critical and hard-to-reach rooftop points, it’s best to contact local safety authorities to hear their take on the optimal ways to handle the situation.
With the anchor point safely installed, you can connect the rest of the system – and there are several ways in which you can see to this task depending on whether you’re using PFAS or SRL. Still, for both options, manufacturer’s instructions will provide sufficient help for safe and efficient attachment. If you’re using a PFAS system, the routine procedure involves attaching the lifeline to the anchor according to the manufacturer’s recommendations after which you can secure the rope grab and lanyard to the lifeline. That set, you can put on the harness and attach the shock absorber end of the lanyard to the D-ring found at the back of the harness. In case you’re using an SRL system, you can connect the anchor directly. If you’re working with an integrated anchor system, you will need to connect the snap hook end to the dorsal D-ring.
Using a sturdy harness is mandatory for altitude works for safety reasons. If you’re still here, you now have the why, wherefore, and how-to for proper roof harness use. Follow the steps above and using a safety harness will be as easy as applying vinyl lettering on a plain surface. Good luck with your roof works, and make sure you stay close to the anchor point at all times!


