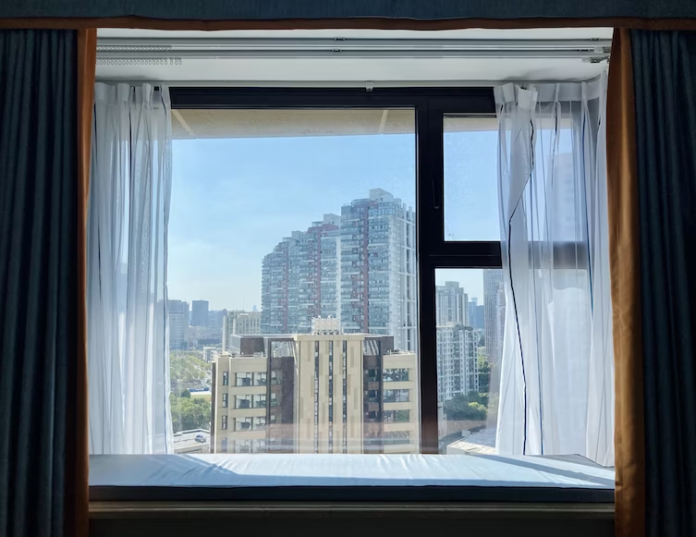
A picture window is a special kind that lets in more light than other windows. It highlights any interesting view. Unfortunately, like all window types, picture windows break and shatter, warranting replacement.
Proper replacement of this kind of window is essential. A crack or breakage on the window interferes with the clarity of the view, so acting immediately helps restore it. Understand how to replace the picture window in a few simple steps below. It is not as complicated as one may assume, but if unsure, work with expert window professionals.
Simple Tips to Replace Picture Windows
There are a few tips and tricks that help when working on a simple or major picture window replacement project. Picture windows are single-pane windows that frame outdoor views to make it look like a picture. Such windows are generally more oversized and immovable. They have been created to be fixed and not open to let in lots of light.
Since the picture window is fixed, the only way to have it repaired in case of damage is to replace the entire piece. To do this, there are a few general guidelines to follow.
1. Safe Removal of the Glass
Never ignore broken glass and assume that it will not cause any injuries. Even if it doesn’t look dangerous, never assume it. Handle broken glass windows carefully. Note that broken glass can be sharp and dangerous.
Make sure to wear thick gloves and other protective wear for protection. Additionally, also get shoes and protective eyeglasses to protect your eyes. On your choice of clothing, go for long-sleeved shirts and trousers to match.
Once your safety gear is secured, get a drop cloth and place it just below the window. Place masking tape or duct tape to cover the cracks in the window. Get a chisel to help eliminate any glazing beads on the frame. Do this by twisting the chisel between the main frame and the bead.
Note that this only works for the bottom and sides of the beads. The top of the beads should be left untouched as this helps ensure the glass remains properly secured. If satisfied, use a knife to help cut off the window’s sealant.
Due to the size of the glass, you may also need to use suction cups to help lift the glass. Pair the suction cups in the middle of the glass before removing the final glazing beads.
When everything is done successfully, and the seal is broken correctly, lift the glass and set it aside. If this appears to be complex, hire a handyman to help with the process. Even as a DIY, make sure to have the correct tools for this.
2. Get the Measurements Correctly
Dealing with a broken window can be risky, especially if you are not experienced. Be sure to find the correct measurements of the window before dealing with it. Measuring the broken window helps to get the right window sizes. However, there is a trick to measuring broken windows.
Start by measuring the window from the top, followed by the bottom, and finalize with the middle. Always measure lengthwise and go with the smallest measurements of the three to serve as the width.
The goal is to measure from one end of the window frame to the other end. In case there is a jamb around it, then make sure to consider the width. Note that even though you will remove the jamb, measuring helps give you an idea of how large the opening is, as well as give you an idea of the jamb that must be replaced.
The final measurements you need to take are the depth of the replacement window. This should be done after the removal of the windowpane. This way, you can measure one side of the frame. In cases where the windows were customized, take custom measurements to match. Working with skilled professionals at this point is a great idea.
3. Pay Attention to the Seal
Once the measurements are correctly done and the new window has been set in place, seal the new installation. Make sure it is tight. You may notice an opening between the window framing and jambs. In such a case, having a backer rod within reach is advisable.
Make sure it is approximately one inch or ¾ inch in size. Work on pushing it into the gap so that it appears to be full. You can use a spatula-like tool to achieve this. When the backer rod is squeezed on all ends, get a high-quality caulk, and on the backer rod’s top, focus on all sides. The caulk helps to smooth out all possible imperfections.
When to Replace Picture Windows
Picture windows are unique as long as they work well. If you already have one installed, it is easy to notice when something is off. There are some signs you need to pay attention to.
There is a Sudden Cool Breeze Indoors
If you suddenly begin to feel a cool breeze when you stand close to the window, this could be a sign of a broken picture window. Your energy bills will increase during the colder months as the heater will work extra hard to compensate for its broken window.
The Outdoor Noises Increase
Ordinarily, a normal window will not provide sufficient insulation to cushion the houses from outdoor noises. However, some windows are installed to help with noise cancellation.
If this is the case and the noise still seems to penetrate the house, then this should be enough reason for you to react immediately. Have the window checked for signs of breakage or damage and commence replacement measures immediately.
Unexplained Increased Condensation in Windows
When the glass’s integrity is compromised, the difference in temperatures can lead to an increase in condensation on the window. The condensation forming on the window pane is natural and expected. However, if it exceeds the amounts you would typically expect, consider checking the window for compromises such as cracks and breakages.
Final Thoughts
Replacing a picture window may not be easy, but it doesn’t have to be complicated. All you need is to master the skills and have the right tools to safely remove the broken glass window and replace it with a new one.


